Related Articles

Last Updated on July 24, 2021 by PixelPluck
When you take a photo, it either be a good photo or a bad photo. It can also be an average photo or what we call a snapshot. How to judge the photos that you shoot? The purpose of the following article is to teach you how to evaluate your photography. You will find 10 questions to critique your photo.
Test your photographs by asking yourself these questions. If you find some mistakes then improve upon them. Be a critic of your photographs. A photograph is only as good as the perspective of the observer. However, many guidelines should be followed for a good photograph. Of course, the rules are meant to be broken when it comes to creativity.
Here are the 10 Questions To Critique Your Photo
1. Are there any distracting elements?
The key to getting rid of distracting objects in your photographs is to be aware of them in the first place. Only then can you work to eliminate them. This means carefully examining the entire viewfinder or your LCD screen, especially near the edges and the corners. It also means looking for unwanted items in the foreground and background.
It’s all too easy to get so focused on your main subject that you lose sight of unwanted elements elsewhere in the frame. It’s easiest to do this careful evaluation of the scene if your camera is mounted on a tripod, but even if you are holding your camera in your hands you should go through this check of the entire image. If you find unwanted visual elements in the frame, the best solution is to move your camera position to move the distraction out of the frame.

Don’t forget that you can shoot from a lower angle or a higher position as well as move left or right. Moving closer might help, too. Sometimes you can physically remove the offending object, as long as you don’t damage anything. A leaf in the wrong place can be picked up and tossed aside. A downed branch can be dragged away. You can also use a long exposure to get better results.
Read more Photography Tips here.
2. What is the background doing?
The first step to improving the backgrounds in our photos is to be conscious of the background’s importance to our photos. We must know that the right backgrounds can make our shots stand out. This often means simply paying attention to what is behind our subjects during our photography sessions. Unfortunately, the complete solution is not nearly as simple. The normal goal is to keep the subject as the center of interest in a picture (not to be confused with the center of a picture). Your eye should be drawn to the subject in the final image, and the background must not be distracting from the subject. Shots must be set up to take advantage of a clean or pleasing background.
Read How to get perfect Background Blur here.
3. Where is the visual weight?
How can the things we see have any kind of weight when they aren’t present? Psychologists have another special term for this. They call it synesthesia. It’s what happens when one sensory system triggers another. In this case, your visual system is giving you a distinctly kinesthetic feeling. It is as if you can feel the elements in the scene.
Our visual weight system works by assigning a psychological form of “heaviness” to different things we see. Few general rules determine how much weight gets assigned to any particular element in a scene.
- Large = Heavier. Bigger things tend to be heavier and more attention-getting. They get a bigger heaviness score by default.
- Dark = Heavier. Darker objects seem heavier, especially when the rest of the scene is relatively light.
- High Contrast = Heavier. This is similar to the above rule. A high contrast subject will draw attention to itself. It has more visual weight.
- Complex = Heavier. You can give something more weight by turning it into a large aggregate of smaller things. Your brain naturally groups them.
- Light Colored = Lighter. The less saturated a color (like sky blue), the less visual weight it has. You need a lot of it to balance out the heavier elements in a scene.
- Heavy = Heavier. I know it seems like such an obvious thing to say, but if something weighs a lot, it gets more visual weight too. A barbell can sometimes command more attention than the arm that is lifting it.
- Interesting placement = Heavier. Objects placed in the corners or about 1/3 into the frame automatically have more visual weight due to the rule of thirds.
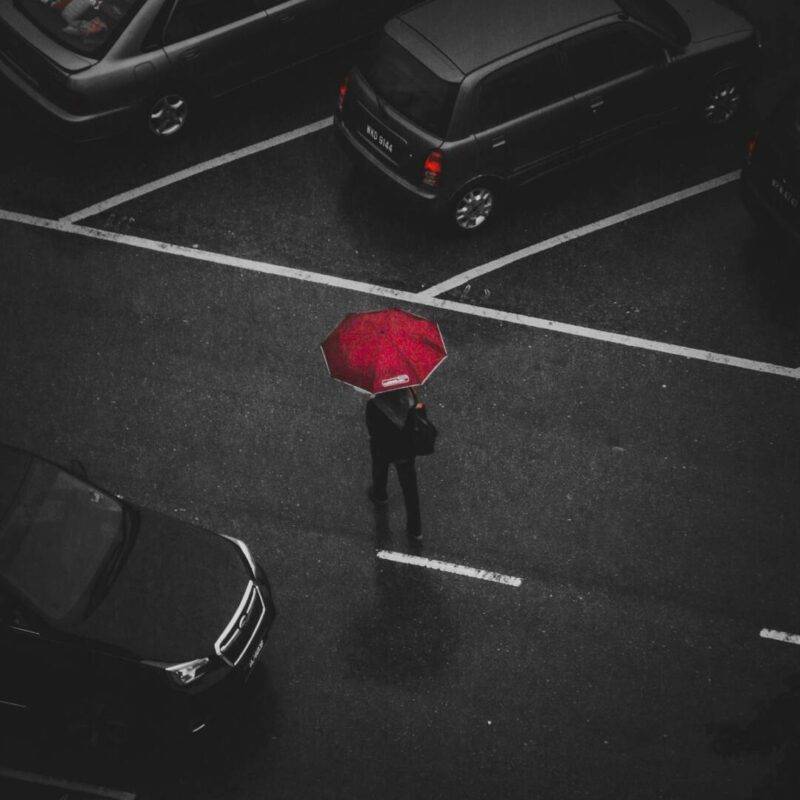
I know that seems like a lot to memorize right now, so just don’t. Here’s the beautiful thing about visual weight. You know it when you see it. Sit back, observe a photo, and let your senses guide you. You don’t have to balance color with color or light with dark. You can mix and match your visual weights! For example, a counterweight to a large, bright area might be a small red object.
4. Is the exposure correct?
When you take a picture with your camera set on Auto mode, you are delegating responsibility for determining the correct exposure to the camera. Depending on the ‘brain’ (or programmed chip) inside your camera, the result may be pleasing or not to your satisfaction. But before you blame the camera for your lousy pictures, it pays to understand a bit what goes on behind the scenes when you press the shutter release button.
Obtaining correct exposure is a setting combination of aperture and shutter speed. For example, your camera’s light meter may have measured a need for an aperture of F8 at a shutter speed of 1/30 sec. If you press the shutter release button now, your camera will close up the iris to an aperture of F8 and open the shutter for only 1/30 sec. to obtain a correctly exposed picture. The amount of light that squeezes through that opening for that amount of time goes to expose the image sensor. A fast prime lens will give you a better range for aperture than your kit lens.
However, here is where the complications show up. If you are taking a picture of a serene and calm landscape, a setting of F8 at 1/30 sec, may be perfect! The small aperture gives you a good depth of field ensuring that objects near and far are in focus. The slow shutter speed may be a problem if you are not using a tripod. A slow shutter speed means that any camera shake (even ever so slightly) will blur the final image. A perfectly exposed blurred image!
5. Is the focus correct?
When a photographer uses the term “point of focus”, he is referring to that object in a photograph to which he wants to draw the most attention. “Focus” itself refers to the amount of the image that is sharp. Both the point of focus and the amount of focus affect the resulting image. In short, altering each one changes the look of the final photograph.

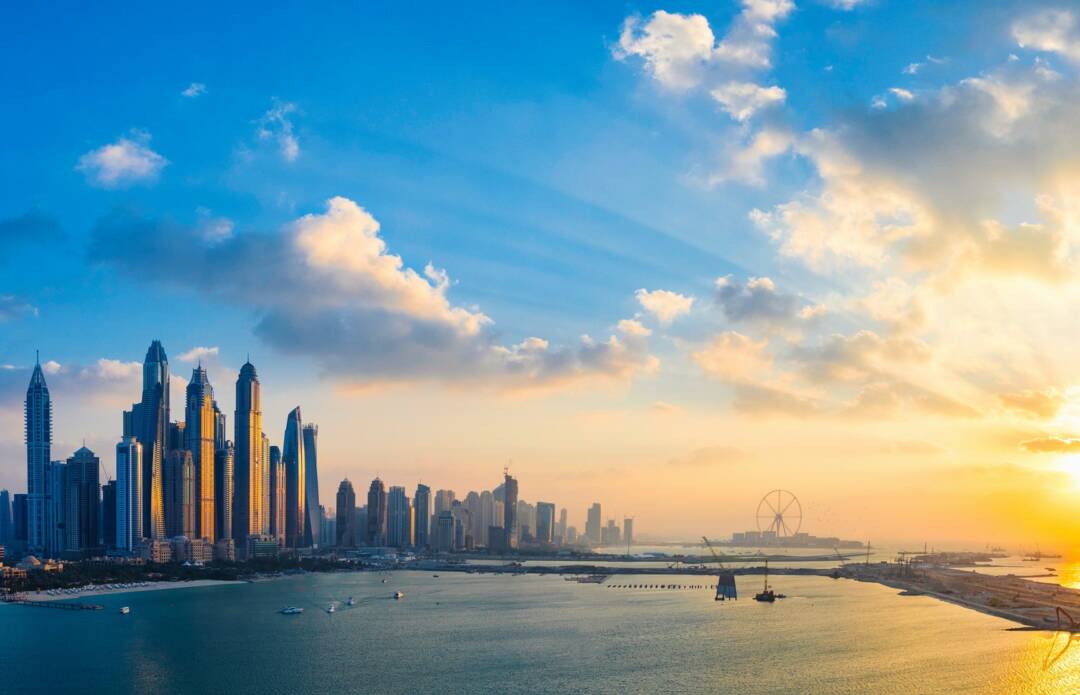
6. What is the composition and the balance?
Pattern, Symmetry, Texture, Depth of Field & Lines play an important role in the composition. Composing an image means arranging elements within it in a way that suits the core idea or goal of your work best. Arranging elements can be done by actually moving the objects or subjects. A good example for this case is portrait or still life photography. Street photography involves anticipation since the photographer doesn’t usually choose to move his subjects himself, but has to wait for them to make the most suitable position within the frame. Another way of arranging elements is by changing your position. Such a way is appropriate in circumstances that do not allow the photographer to physically move anything, like landscape photography.
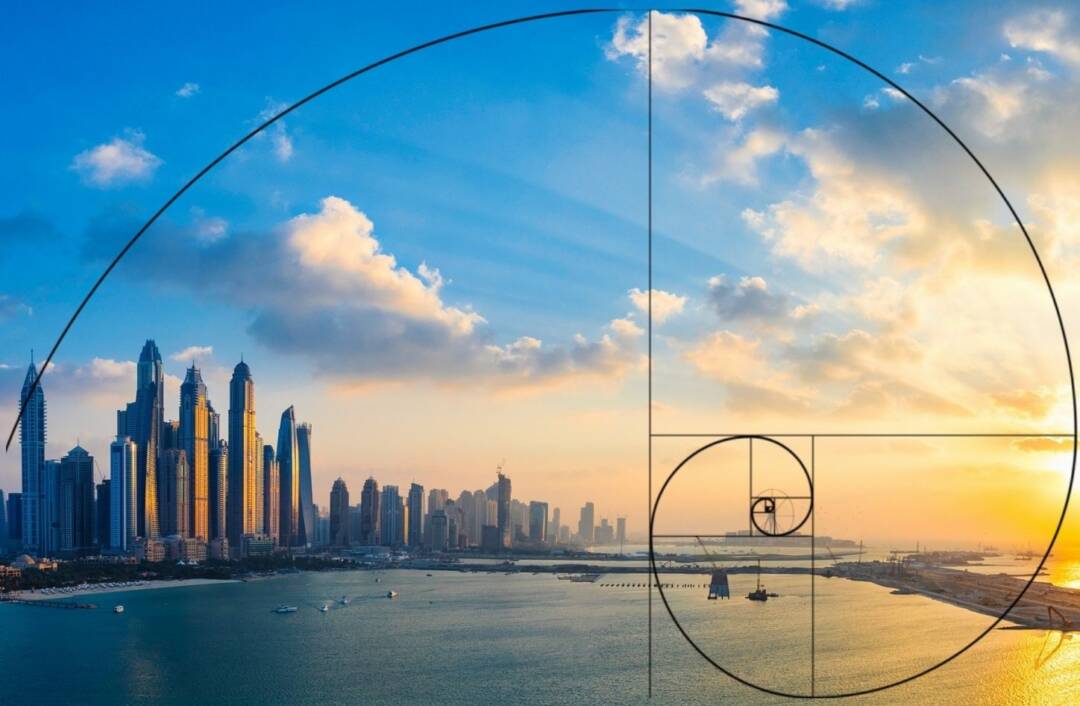
Composition is a way of guiding the viewer’s eye towards the most important elements of your work, sometimes – in a very specific order. A good composition can help make a masterpiece even out of the dullest objects and subjects in the plainest of environments. On the other hand, a bad composition can ruin a photograph completely, despite how interesting the subject may be. A poorly judged composition is also not something you can usually fix in post-processing, unlike simple and common exposure or white balance errors. Cropping can sometimes save an image, but only when tighter framing and removing certain portions of the image are the correct solution. That is why giving your choice of composition plenty of thought before capturing an image is a step of utmost importance.
7. Does the photo require post-production?
If yes then to what extent? Depending upon the genre of Photography and the situation you may or may not need post-processing. If you do then ask yourself if it could have been done by changing any settings in the camera itself? Remember the mistakes you did and improve upon them the next time when you go out shooting. A post-production is an option but not a necessity.
8. How accurate is the color and white balance?
Sometimes you need to boost the saturation to create an impact. But pay attention that the colors don’t start popping out of the image and disturb the balance of the image. Choose the right white balance depending upon what mood you want to show.
9. Does the depth of field suit the photograph?
When we get a DSLR we induce a habit of blowing everything out of focus. Sometimes you may need to keep the background in focus to show relativity. It may work very well in certain situations. Decide the correct depth of field for your composition. Landscape photographs need more depth than portraits.
10. Is the photo cliche?
Are you photographing the same thing in the same way that everyone does? Then you better do something different and discover & build your style. Get inspired and follow other’s work. You can try recreating other’s work to learn the process. Infuse your creativity to make it different.
These 10 questions to critique your photo will help you judge your photographs. Everyone has their perspective towards Art. Photography is an art and if you think you created a good photograph then that’s it. Keep learning and keep improving.