Related Articles


Last Updated on June 19, 2017 by PixelPluck
60 Tips on How to Take Good Pictures
Here is a comprehensive list photography tips and tricks. Photography is a wonderful medium to preserve your memories, create arts, share them with friends and family. Some people may tell you that to do this you need an expensive camera, but in fact, the best camera you will ever have is the one you have. You can also take amazing photos using your smartphone. Good technique is far more important than an expensive camera. Light plays such an important role in your picture taking, so it is well worth spending some time learning about this, and other techniques that will enhance your colors and composition. After reviewing some of the basics about good photography, you will find that your picture taking produces shots that you will be proud to display! 60 Tips on How to Take Good Pictures.
Know your camera
- Read your camera’s manual: you might think that everyone does this, but you would be wrong. Often people load up a film and head out with no idea of how to use their new toy. It is a very good idea to take yourself and the camera manual off somewhere quiet and read it. Your new camera will be completely different from the one you had before. It will feel strange until you get used to it. Better to get to know it in peace and quiet than when you are rushed to take shots of the family gathering!
- Learn Manual and Priority: if you buy a digital camera, you may wonder why this should be important. Learning the Manual Mode of your camera is similar to using a SLR from years ago, when you had to make all the adjustments yourself.If you think about it, is is a good idea to know this because it will be much easier to fix your camera when things go wrong. You will already understand all the manual modes which work for you.Priority is great, but once you have taught yourself how to use the Manual Mode you may find that you never use it, as you can get better results yourself.
- Take your time: get familiar with your new camera. Learn the basic actions such as on, off, auto, zoom in and out and using the flash. There will be many more actions that you should master but these will get you off to a good start.
- Check your hold: the quality of your shots depends greatly on the way you hold your camera. Ideally you should hold it with both hands so that you have maximum control over it, and a lot less wobble. Support the lens with your left hand and the camera with your right hand. This is the easiest way to keep the camera steady while taking a picture. You can also keep your elbows tucked against your body to help steady things even more. If you have both hands on your camera you will often end up with blurry pictures.
- Use a tripod: some people have a hard time keeping a steady hand and this is where a good tripod comes in handy. Not only that, but a tripod allows you to adjust to different angles. There are mini tripods available which are just long enough to be placed on a table top or a lower angle.
There is no need to spend a fortune on a tripod, as long as it is sturdy and not flimsy. In this article about tripods you will see that it is important to have a sturdy tripod. Check for best tripods .
. - Learn about high resolution: images which have been taken with low resolution are a lot more difficult to alter, and neither do they look as good as you would like them to. You should change the settings to that of high resolution to ensure that you get the best definition photos possible. One point to remember with high resolution is that this uses a lot of memory, so it is a good idea to buy a larger memory card for this.
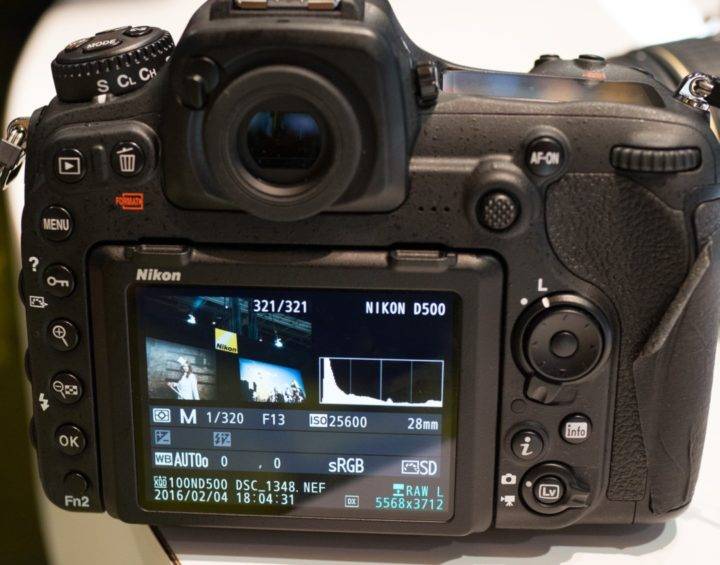
- Know your shutter speed: an unwise choice of shutter speed is the difference between an average shot and an excellent one. The wrong speed may even make your picture blurry. Any movement such as the kids running around will need a shutter speed over 1/500th of a second. You could even go up to 1/1000th for this type of picture. Should you wish to get a shot of a car’s lights then you might change the speed to a long exposure such as one to 10 seconds. Occasionally you might even need one longer than that.
- Learn Automatic Mode: these days most digital cameras have an automatic mode whereby the camera senses that you are taking a shot of someone in low light. It will then adjust the setting to make it easier to take photos. If you notice that your shots are coming out badly focused or exposed, then it is a good idea to start using a manual setting. Portraits will benefit from using your anti red eye function.

Know your subject
- Get your subject to relax: this is possibly one of the most difficult things to do, and if you achieve this, your battle is pretty well over! This is particularly relevant in portrait photography. It will always be advantageous if you can spend time talking to your subject before you start to take pictures. Find out what they like to do and be genuinely interested. Any conversation like this will help them to relax, and a relaxed person makes for a better photograph.
- Learn a joke: while it would be great if every subject produced a smile when you asked them to, this does not happen all the time. Learn a few jokes, often you will find that telling a joke gets a far more natural smile than merely asking someone to ‘smile’ on tap.
- Eye contact: when you make eye contact with your subject, you instantly form a connection with them. Stop taking pictures every so often and lower the camera, as if you were coming up for air. Remember that they are not your personal science experiment under a microscope, they are human and have feelings about you in front of them with a camera. Respect their feelings of tension or apprehension and take a break when needed to bring it all back into perspective. A calm and relaxed subject will give you more natural pictures.
- Be considerate: remember that your subject may need a comfort break, or a walk outside. Stop every so often and ask them. By showing some consideration, you will not only put them at ease, but also ensure a more relaxed picture. You will never get a good shot when your subject needs a bathroom break!
- Don’t center your subject: if your subject is placed off center, you will find that the picture is far more interesting. Remember the Rule of Threes and place them on one of the lines, leaving the center space as empty as you can. This way the eye will be drawn towards the image that is important in the picture.
Read how to make good portraits by making your subject relax to capture natural expressions.
Use light effectively
- Turn off ‘on Camera’ flash: flashes that are attached to the camera make your subject look very unflattering and flat. When light comes from the same angle as the lens, it depletes any natural shadows. This will reduce your new camera to not much better than taking pictures with your phone. While some phone take very good pictures, there is simply no comparison between that and a good camera with an external flash. Pop up flashes on cameras do not do your photography any justice, treat yourself to an external flash and you will see the difference immediately.
- Master the White Balance: when you shoot inside without a flash, you will notice that people in your pictures appear to have orange tinged skin. You should master White Balance to counter this problem and once you have done this your pictures will be a cut above the rest. Your end results will be dramatically improved.
- Locate the light: you need to know where your light is coming from. This will ensure the best lighting for your shot. Even before you start, look around and locate the light. It may be from a skylight, or a door. Make sure you know where the source is. Now avoid taking your pictures with the source directly behind you. This makes for a boring picture. Try to have the light at an angle to your subject, despite what you learned with your very first camera about having the light shine right into your subject’s face.
When you shoot outside, the same principal applies. Never have the sun shining right into your subject’s face. You will end up with a false smile and possibly a grimace. - Use the ‘Golden Hour’: this magic time only happens twice a day. An hour before sunrise and an hour after sunset. You will notice that it is in this time that your subjects look as if they have a warm glow. Shadows show interesting shapes and are longer at these times, which adds a visual interest. If at all possible, take your photographs outside during these times. Portraits and landscapes work very well when taken during this time.
- Avoid harsh light: sometimes the sunlight can be far too harsh and if you are taking a portrait it can make it difficult to define the details on a face. Your subject will also tend to look very washed out. To avoid this, you might try shooting in the shade as this will give a whole different look to your portrait.
- Use your flash: don’t think that the only time you should use your flash is in dull light. Using a flash in brilliant sunshine can be very effective, especially if the sun is bright around the middle of the day. This time of day often produces pictures which have harsh shadows, but using a flash means that you can direst the extra light towards the shadows and give your subjects a gentler glow. You will find that this results in photographs which are very pleasing to look at.Check out for best flash for your camera.

- Use the light: you will find that if you take your pictures with the light source, whatever it may be, coming from the side of your subject and at an angle to them, you will be able to shape the light and create some very interesting shots. You may have to re-position your subject if the sun is the source, but as you do this you will be able to see how the shadows change and stop when you are pleased with the effect.
Frame your shots
- Frame within a frame: the idea of a frame inside a frame may sound strange, but you will find that if you manage to put a doorway or window in the picture, it adds to the depth of the photo. Archways, doorways, window frames and natural curves will all serve as very good frames.
Frames tell your viewer more about your composition and what is happening in the picture and adds a further point of interest to it. They lead the viewer’s eye to your primary focal point. - Find the story: take a little time to think about what it is you are trying to tell your viewers. Take a person standing at the bus stop. What are they trying to say? Are they impatient, anxious, weary? Think how you could frame your subject to tell the story in a better way.
To make a person seem lonely, you may try to omit any other people in the shot. Every area around your subject will be able to tell you something about your picture, and different angles will enhance the picture. - Get close: if you are too far away from your subject, they will not look too good. You will notice that the details are difficult to see. Try moving a little closer. Start taking your shots from 10 feet away and then move in to the five feet mark. Check your shots and perhaps move in to three feet, until you have captured the essence of your picture and have the shot you want.
- Find your focus: the subject of your picture should be the focus of your shot and this is where you want your viewer’s eye to move to first. Take your photo with your subject within the arch or window in the background or the foreground so that the emphasis centers on your focal point.You can also use people as a frame to surround your central point. Make sure that your subject is surrounded on all sides. Here is a guide on composition for landscapes.Sometimes the object of your focus may be an item such as a park bench with no one sitting on it. You may then have a person in the distance in a slight blur so that the eye first goes to the empty bench. The opposite will also work where the person in the distance is the focal point and the bench in front is secondary.
Bonus points
- Explore different angles: most people start taking pictures by holding the camera straight in front of them and snapping away. While these make acceptable pictures most of the time, there are many different ways to take a better picture. One of them is to change the angle of your shot. Perhaps try climbing to a higher area, stand on a ladder.
A lower position gives a different perspective, try kneeling down. Think about your subject before you start shooting. Pet and small children are better when you are at their level. Watch out for the down side of this position too as no-one wants a shot taken of the underside of their nose!
Even lying on your tummy will change the whole picture and show more of the area. For people, some of the best shots come when you are slightly above eye-level.
Consider bringing your own step stool with you, but also look out for benches or stairs which can aid you.
In this article about angles you can see how they can create a great sequence of images. - Zoom in closer: Instead of using a zoom lens, try to get closer to your subject yourself. Think of yourself as the zoom lens. Look for the details that you want to be in your picture and make them the subject of the shot. Try to spend a moment thinking about what exactly you want in your picture before you shoot.
Check ⇒best lenses to upgrade from your kit lens. - Check the background: have a good look at the background and see if it is acceptable. It is as much a part of your finished picture as your subject. You may not want the eye to go to the background first.
Sometimes moving the camera a few feet to one side will give you a better, uncluttered background which will enhance the picture. One question to ask is if the background adds something to your shot. If the answer is ‘no’, then change it.
Watch out for other people, overhanging branches and parts of objects which may not be what you want in the picture. - No red eye: when the camera flash reflects of the retinas, you get red eye. Most of the time this happens when the picture is taken in low light. You may have seen pictures with red eye taken at parties where they have been shot if subdued lighting. While the picture was good, it was ruined by red eye.
You can try turning on more lights while you take the pictures. You should also tell your subjects to look away from the camera. If they are looking at another object, there is less chance of the flash reflecting on the eyes.If you turn on the red eye function on the camera and also tell your subjects to look away, then you should be able to avoid red eye shots. - Lines and shapes: some buildings, either inside or outside, lend themselves to enhancing the quality of your shot. They are visually pleasing. Try to incorporate them where you can. You might photograph your subject in front of any of these, which will serve as a backdrop to your picture.
Architectural features such as old doorway, or windows, will make the picture more pleasing to look at, and add an element of further interest to it. - Remember the foreground: if you shoot something in either the foreground or the background, you will find that there is another dimension to your picture taking. If you intend your subject to appear larger than normal, then place them in the foreground with something in the background. Similarly, if you intend your subject to appear diminutive, then place an object in the foreground and your subject in the background.
- Close in: In a quote by a famous photographer, he said that if your photographs aren’t good enough, you’re not close enough. Take a step or two closer to your subject, fill the frame with them and you will notice how much better your pictures look. It also means that you will be able to see more facial details, which ten to become blurry when you are too far away.
- No more chimping: this is when you take your shot and immediately look at the screen. You need to learn not to do this as you are more than likely going to miss some very precious moments. It’s a bad habit which you should break. The idea is to keep on shooting and check your shots later. If you do this, you will find that often the second shot is far more natural than the first.
- Forget watermarks: if you feel you must use them, then make them as small as possible because if your portfolio is covered with them you will find that they distract from your photos. People tend to spend time looking at them and not at the good effects of your latest shoot. It is unlikely as a professional, that your photographs will get stolen, and the images don’t even prevent that. There is only one way to keep your pictures from this, and that is to never let them get onto the internet.
- Batteries: take a spare! Charge your battery as soon as you walk back into your home. This way they will be fully charged and ready to go with you in the morning. Just pop them into the camera and you are ready to go. If possible, have a spare battery in case of emergency.
- Learn about focal lengths: it is a really good idea to try and keep this simple. The less fiddling about with lenses that you can do, the more you stand a chance of taking great pictures. Conversely the more time you spend changing lenses the more likely you are to miss special shots. A 28mm and a35mm are a good combination to start with. You should spend some time learning all about these and you will find that you spend less time fiddling and more time photographing. If you keep the same focal length you will find that there is a sense of continuity in your shots.
- Use your eyes: make it a habit, even when you are not taking pictures, to look at things and think about light conditions. Notice expressions and imagine how you would shoot a scene, where you would place your subject and what exposure you would use.
- Always try to return the favour: this is particularly relevant if you are in another country shooting points of interest there. Oblige them by posing for them, and you will be amazed just how you are rewarded with kindness from them. They are doing you a favour of posing for your pictures, so you should return the favour for them.
- Learn the Rule of Threes: if you take a piece of paper that is square and draw two horizontal and two vertical lines which are all equidistant from each other – so you end up with nine squares all the same. If you were to place your subject on one of the lines, or where the lines intersect, you will create a much better, and more dynamic picture.The Rule of Thirds suggests that you leave empty space in your picture because this will draw attention to the focal point. When taking action shots, they suggest that you leave empty space in front of the action movement. So, if your runner is running to the right, you would center him at the left and leave open space at the right as it creates the impression of movement towards the right.You do not have to stop centering completely as sometimes this is needed to fill the screen. Centering is also effective for photographing reflections.
- Always carry your camera: you will never be able to take that perfect shot if your camera is at home in its box! Whether it is your point and shoot, smart phone or DSLR take it with you all the time. Unique moments happen when you least expect them and if you are not equipped, you will regret it.
- Keep things simple: if you add too many things into your shot it will end up looking messy and not have the effect you want, so it is a good idea to keep things simple and uncluttered. If there are more than one point of interest your audience will be confused about what you are really trying to tell them, and they will not know where the message of the picture lies.
- Simplify your equipment: we have all seen comedies about photographers laden down with equipment and then missing the whole event because they were so busy carrying all their gear, that they arrived late! Don’t be that photographer! Simplify your gear, bring what you need and leave the rest at home. One camera body with two different lenses normally works just fine.
- Change the perspective: your shots will have different perspectives if you change your own position. Crouch or lie down and see how this makes your subject appear. This will give your subject a more confident pose, while taking a shot from above makes them seem smaller. Occasionally try taking pictures from completely different angles and see just how the whole perspective changes.
- Watch the background: you really do not want a picture of the bride and groom with a rubbish bin behind them! The picture is not just about the people you are shooting, but also about what is going on around them. Make sure of things like this before you spend time on wasted pictures.
- Work the shade: if you really cannot work with the light that you have, then try shooting in the shade. There is a very subtle difference when you do this and you will see that your pictures have a different colour with no patchy lighting.
- Use the lines in the ‘thirds’ rule: remember that placing your subject on one of the lines will give a picture that is completely different from one when they are not on the lines.
- Work on exposure: if you must shoot with the sun behind your subject, then you may want to over expose a little bit because this will bring out an even tone and make the faces seem less flat. Normally when shooting with the sun behind them, the faces appear with shadow details. Over exposure will correct this.
- Get it right first time: this goes back to knowing your camera like the back of your hand. The more you know your camera, the less time you can spend editing your pictures. Remember that time is money, so try to get it right the first time so you do not have to spend time editing. These photos rarely look any better than the ones you took anyway. If you need to spend more than ten minutes cleaning up and editing a shot, you may consider reshooting it.
- Vary things: when you are going to photograph a story, have an idea in your head of a story and the shots that will tell it. Think about different scenes, different mediums, and alternative interactions.
- Gel with your camera: try to think of the camera as an extension of your hand. You should become so familiar with your camera that you feel lost without it. Take the shot, take lots of shots! This way, you will always be ready for that ‘once in a lifetime’ shot!
- Clean up colors: the less colors you have in your photo, the easier it will be to look at. It will be far more pleasing to the eye and your audience will find your focal point right away. Aim for just one or two colors dominating your picture.
And some more tips and tricks:
- Take it slow: take some time to think about what you are looking at before you push the button. Does the light look good, is the background as I want it? What is the best angle to compose it? Even before you shoot, take a slow and thoughtful walk around the area and find things you may include. Also, make a note of those you do not wish to be included, such as the wash line full of clothes.
- Invest in good books: a good book that you can refer to again and again is worth its weight in gold. Do yourself a favour and invest in some good books. You should also buy some of other photographer’s work to keep you motivated and encouraged. Remember that they all started out as beginners. When you look at the work of some photographic masters, you will be motivated to follow your career.
- Ignore the rules: work on the premise that rules are meant to be bent, if not broken! This is certainly true in photography. If something works for you, stick to it, do it again, or change it. Learn from your mistakes, and be better next time. What is most important is that you have fun doing it.
- Find inspiration: if you take the time to look, you will find inspiration everywhere. There are literally thousands of books online and at bookstores which can inspire you to try different angles and compositions. Take a look at other styles and decide if they would work for you or not. See the technical side of photographs and think what you would do better. You will find that the more you look and listen, the more you will know about photography.
- Patience and perseverance: believe that over a period of time, you will improve. Believe in yourself. You thought you could do this and now you are doing it. You saw something in yourself that you thought would make a photographer. Believe that you can do it, and do it better.
- Show respect: when you find yourself in another country, or even in your own, shooting a stranger, be polite and respectful. Ask permission to take a picture before you start. This is particularly true in some countries where taking a picture may result in a fist fight because of the culture. Ask first! Be respectful to other people, whether they are of your culture or not. It’s the polite thing to do and will get you many favors.
- Hone your skills: the best and quickest way to do this is to shoot something every day. Whether it is a bowl of fruit or the neighbors’ sleeping cat, take a picture. Experiment with your own style. Your true style will emerge and it will be truly yours.
- Join a group: often you will find a local photographic club and you should join this community. Not only will you pick up many tips, but you will also be able to see how others work. You will pick up techniques to improve your own shots, and you may even make some new friends! If you don’t find a group then search on social media. There are various groups dedicated to specific camera models. You can learn a lot from others and also share your insights.
- Ask for feedback: try to get feedback from another photographer. Share your images and ask for comments. This way you will find out what your strong points really are and where you could do with a little more work. Even a negative comment can be worthwhile if it gives you something to improve. Remember that everyone starts somewhere, even the best photographer started at the beginning.
- Practice and more practice! If you want to be good, you must practice, simple as that. There is a quote which is very relevant here, although it was made by a golfer who was complimented on his superb shot. He replied ‘It’s funny, the more I practice, the better I get’. Take this mantra and stick it on your wall!
60 Tips on How to Take Good Pictures. This article was republished with permission from JenReviews.
great article for beginners on what to know before shooting and how to take good pictures without any fancy stuffs..
thanks for sharing.