Related Articles


Last Updated on May 4, 2016 by PixelPluck
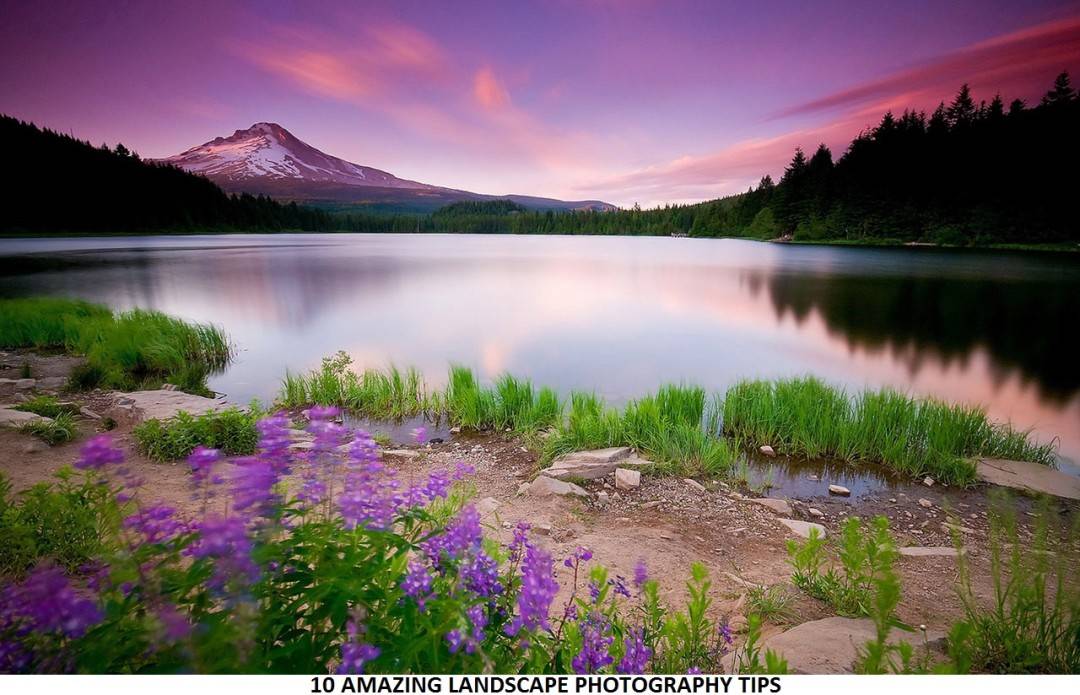
10 Amazing Landscape Photography Tips and Tricks.
There’s something special about getting out in nature with the challenge of capturing some of the amazing beauty that you see. Landscape photography is one of the most popular genre of Photography. Check out these 15 Landscape Photography Tips and Tricks.
1.Golden Hour or the Blue Hour Rule.
The most beautiful landscape photos are often defined by the quality of light they were taken in. The soft afternoon or morning light that happens around sunrise or sunset is simply the best time to be out shooting landscapes. It’s not always possible to get out at these times, but you will almost never be disappointed if you can. If rising at dawn doesn’t sit well with your idea of a relaxing weekend, don’t panic – there are plenty of great landscape opportunities throughout the day with different lighting conditions. And now with cameras like the Sony a7sii, you can even shoot in pitch dark.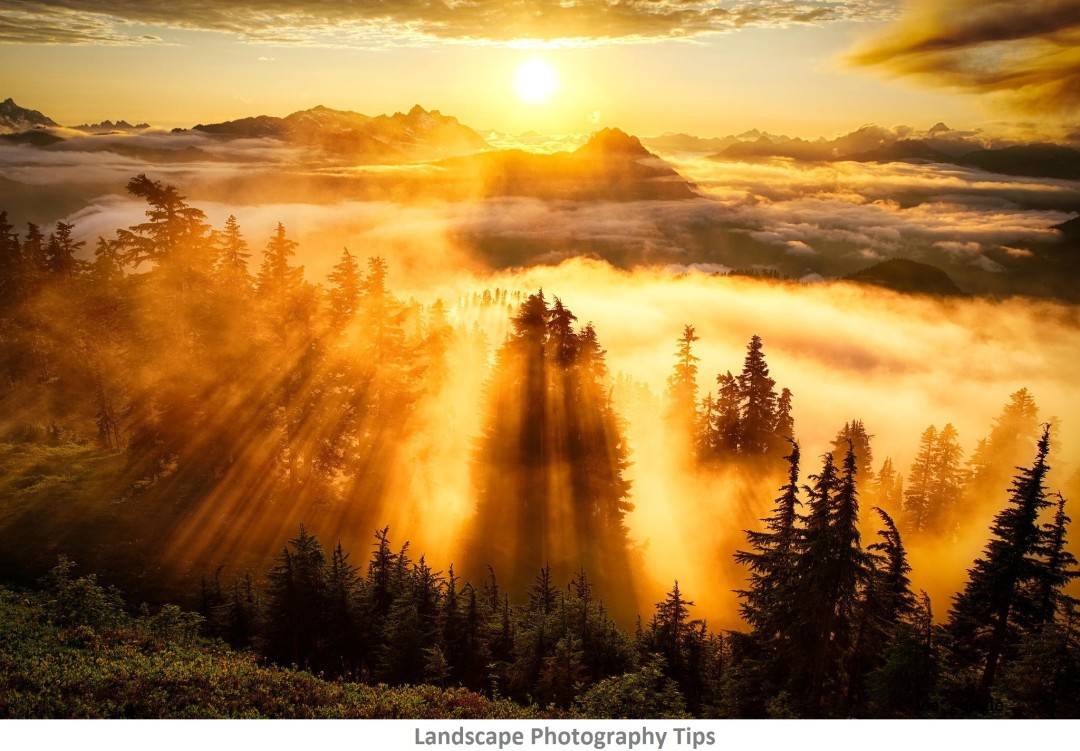 2. Use the best Possible Tripod.
When you shoot in the Golden hour or Blue Hour, you are almost certainly going to need a tripod to keep your camera steady and your resulting shot sharp. Tripods can be used for many different reasons. Usually when the shutter speed is slow. Investing hundreds and thousands of dollars in your camera and lens is not justified if you put them on a shaky $20 tripod. There are plenty of options which are cheap and sturdy at the same time. If you don’t use your tripod to shoot video then just get a ball head tripod and never look back. Ball head tripods will give you full flexibility to compose and move your camera in any direction quickly. If you don’t have a tripod then use a flat surface and put a small bean bag pillow. You can use live-view mode and then remote to fire the shutter.
Some of the best selling and highly rated tripods are Dolica (for Hobbyists) , Vanguard Alta Pro (for Advance) and Manfrotto (for Pro).
3. Composition.
Composition is key to successful landscape photography, and if you don’t know where to start, use the ‘rule of thirds’ to get things going. Your landscape should have a foreground as well as background. But they should be so subtle that the viewer’s attention may get locked in between the foreground and background. Include a point of interest in the subject which may create different story with a different perspective of the viewer. Read 10 Amazing Rules of Photography.
4. Correct Location and Wide Angle Lens.
When you are shooting landscapes, do some basic research beforehand. Know where exactly the sun will rise and set or just how the shadows will play during different times of the day. Working out where the sun will rise and set, and the sun’s position in relation to you and your landscape, will ensure you’re in the right place at the right time. During early morning and late evening hours the shadows are very long and makes things little more interesting.
Wide angle lens helps you to capture wider filed of view. Also wide angle lens creates a unique perspective and feels closer to the real world view. Tokina 11-16mm f/2.8 is a great choice for beginners as well as advance photographers. The Nikon and Canon branded wide angle lens are slightly superior but you would only notice that if you are professional. But hey, they cost three to four times of this positively reviewed Tokina lens!!
5. Shoot in RAW Format.
It’s always best to shoot landscapes using your camera’s RAW quality setting, because the resulting images will contain much more ‘information’ than that of normal jpeg file. This gives you more scope to increase or decrease the exposure or enhance the tones and colors in Adobe Camera Raw or similar RAW processing software afterwards, without compromising quality and in a non destructive manner.
Read RAW vs JPEG – Everything that you should know.
6. Pre-Visualize.
Before setting up your camera, visualize in your mind, the final photograph you’re trying to capture. Take a few sample shots by shooting handheld, moving around, getting up high and kneeling down really low to check different perspectives. This will also help you to adjust the settings on your camera. Take several photos until you’re sure you’re in the best spot with the best settings for a good, balanced composition of foreground and background elements. Once you’ve found the best location and setting use your tripod if you have enough time at hand. Its always good to use a slightly slower shutter speed to let the beautiful lights expose the sensor naturally.
7. Check Camera White-Balance Settings – WB Auto.
Ensure that it’s set on ‘auto’ if you do not understand how camera manipulates white balance according to your settings.  When you shoot in RAW format you can always adjust the white balance to your liking during post processing.
8. Maximize your Depth of Field by Shooting With a Narrow Aperture.
For successful, sharp landscape photos, you’ll want to ensure your entire scene appears in focus from front to back. To achieve this, select a narrow aperture of around f/8 or f/16 to get maximum depth of field, then focus one third into the scene to ensure your photos are acceptably sharp from the foreground to the horizon.
9. Shoot at Lowest possible ISO.
The beauty of landscapes is that you can usually plan your shot even before you arrive at location. Keeping the ISO to a minimum will help you get cleaner image which will be free from digital noise. Low ISO will also help you get an extended shutter speed.
Learn how to take good Photos in low light.
10. Lens Filters.
Most landscape photographers will have lot of filters in their kit bag. They may be ND filter, CP Filter or Variable-ND Filter and so on. And sometime they may be bigger than the lens itself like the Lee’s Big Stopper. There are many uses for filters, but for the landscape photographer the two key characteristics are:
- Their ability to cut out reflections and nasty glare from a scene and the increased color intensity, saturation and contrast they create. You’ll really notice the effect in clear blue skies.
- Long Exposure Photography. The Neutral Density filters are pitch dark and reduces the amount of light entering into the lens. Hence it increases the required exposure time resulting in moving surreal flat clouds and flowing milky water from fountains. Or even the extremely long light trails on the valley roads.
Learn more about Filter and how to choose the right filter in this Article ⇒ Introduction To Lens Filters. A Simple Guide To Lens Filters.
Looking to upgrade your lens from Kit Lens? Check this tutorial.
Have got any question or tips? Share below in comments.